
So, you’ve had your listing photographed by Mediamax and your Mediamax Virtual Tour has gone live online. Now what? Well, there’s plenty more you can do with the photos. For instance you can share them on your website and on social media. You can add them to your newsletter or periodic “just listed” email blast. You can use them in printed materials like fliers and brochures. To make use of some or all of your photos in any given tour, you first need to download them to your computer.
Before I describe how to download your photos, let me say a word about Zip files. Zip files are compressed to make sending them to your computer easier and faster. Think of it as letting the air out of a plastic bag so your trail mix takes up less room in your backpack. You’ll only encounter Zip files when you download multiple images at once (so called bulk download). For all intents and purposes, the Zip file that arrives on your computer is just another folder, albeit a funny-looking one. You can open it just like you can any other folder by double clicking it. Although it’s called “extraction,” retrieving your photos from a Zip file is just like retrieving the contents of any other folder. In other words, don’t let the terminology hang you up.
Step 1: From My Tours, click on the tour you want to download photos from.
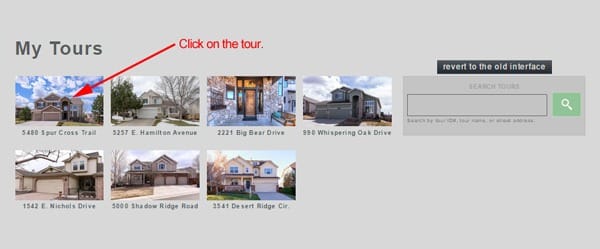
Step 2: Click on the Downloads icon.
![]()
Step 3: To download individual photos one at a time, navigate to the image you want. Click on the size you want. The file automatically downloads to your Downloads folder.
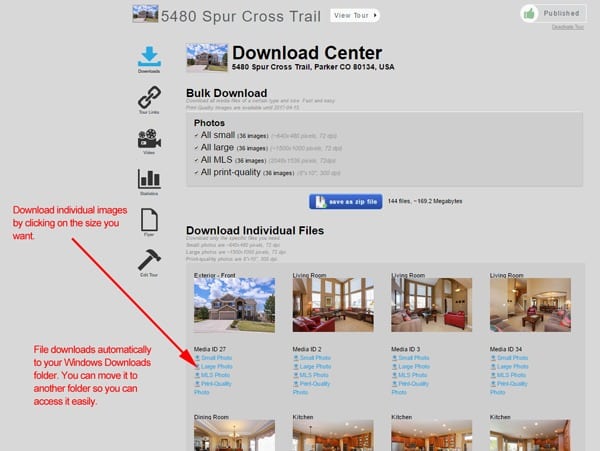
Tip: The download will show its progress on the lower left of your screen. When done, you can click on the file name to view it. Better yet, click on the arrow to the right of the file name and click “Show in folder.” This will highlight the file in your Downloads folder. You can drag and drop it to another location from there.
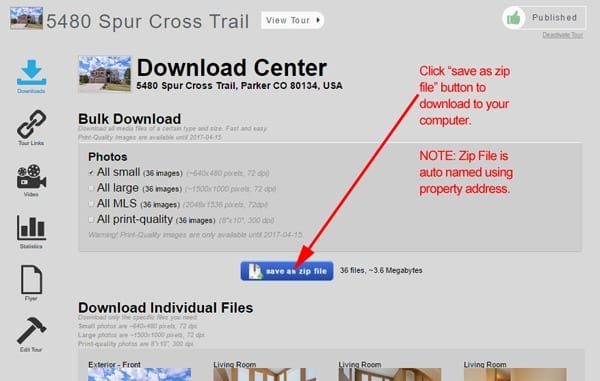
Step 4: To download multiple files at once (bulk download), first choose what to download (small, large, etc.) by checking or unchecking the boxes. Note: The default is set to download everything.
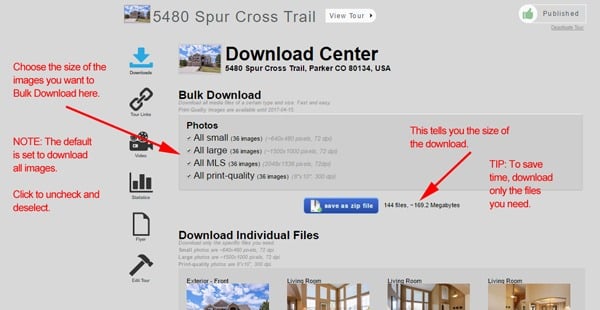
Step 5: In this case, I want only the “small” images, so I unchecked the others. Note: the size of your download (and number of files) is displayed to the right of the blue button. This changes according to your selection. The bigger the download, the longer it’ll take.
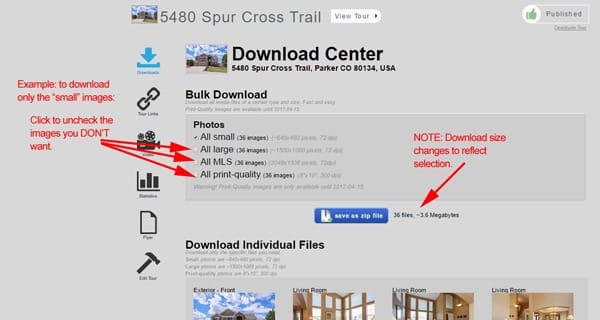
Step 6: When you’ve chosen what to download, click the blue “save as zip file” button. The system automatically sends a Zip file named with the property address to your Downloads folder on your computer. Use the “Show in folder” tip above to find it quickly.
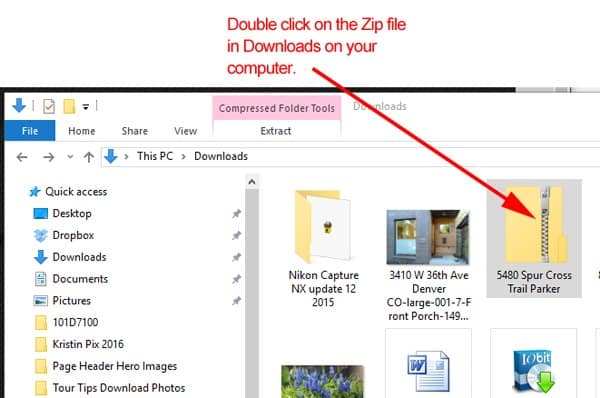
Step 7: Open the Zip file by double-clicking it. Note that using “Show in folder” highlights it. But Zip file folders have a distinguishing zipper on the icon that makes them easier to see.
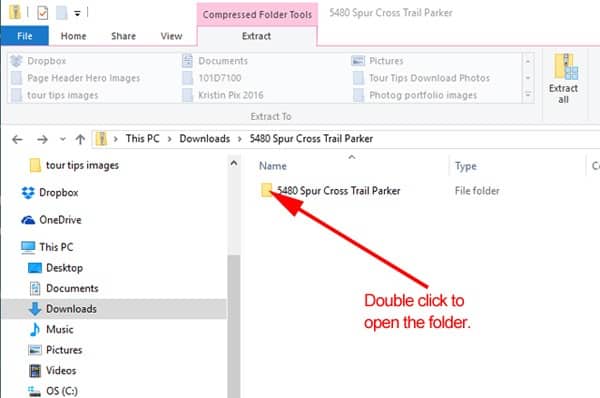
Step 8: Open folder in the Zip file by double-clicking it. (Note: attempting to extract here can generate an error message in Windows. Open first and go to Step 9.)
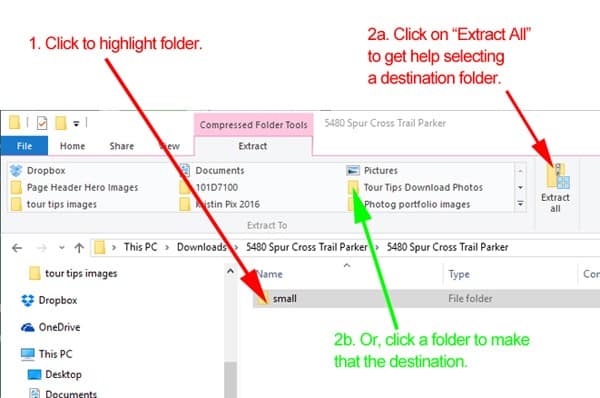
Step 9: Click once on this folder to highlight it (called “small” in this example). This activates the “Compressed Folder Tools” area (highlighted in pink). Then click “Extract All” for help selecting a so-called destination folder (location where the files will be “extracted to”). Or, click on one of the folders in the “Extract to” area (note: file is “extracted” immediately. Navigate to that folder to see or open it.).
Tip: You can also use the two-windows, drag-and-drop method: Open your Downloads folder in one window. Open a second window with your “destination” folder (right click a folder and select “Open in new window”). Click on the folder in the first window and hold. Drag it into the second window and drop.
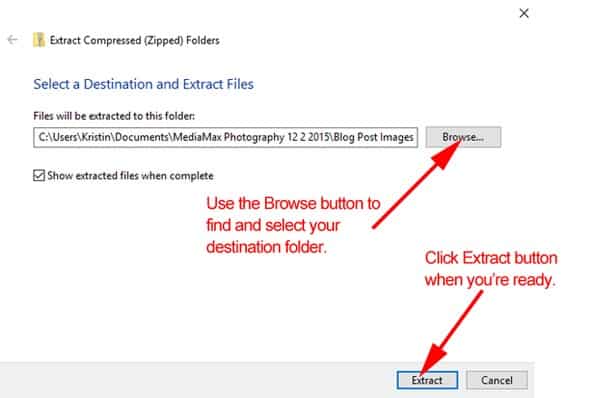
Step 10: If you do “Extract All,” use the Browse button to find and select your destination folder. Then click the Extract button.
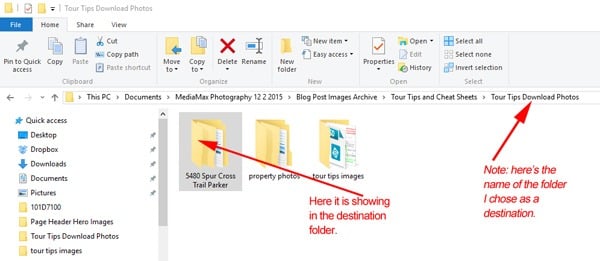
Step 11: Navigate to your destination folder to access your photos. Note: one advantage of the Extract All method is it auto names the folder with property address.
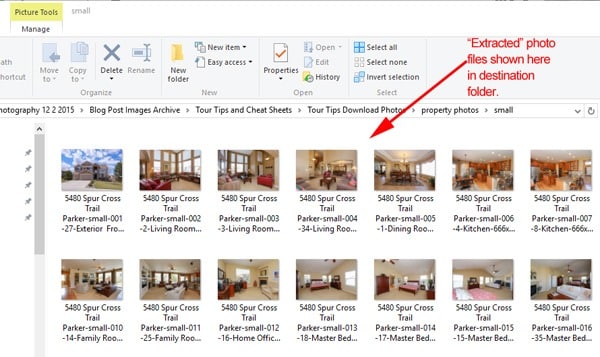
Open the destination folder to see your extracted photo files like this:
You’re done! Now you’re ready to put your photos by Mediamax to work selling homes and winning more listings.
Schedule a personalized “How to Use Mediamax Virtual Tours” presentation for your office. I’ll go over everything you need to get the most out of your tours. Call my direct line at (303) 988-6809.